You are so lucky to have a paper cutting machine such as Cricut Explore Air 2 or any other. It will take about five minutes to create unique gifts for yourself and the people you love. Digital Art Dreams wants to share a quick guide on crafting a cute DIY pineapple vinyl cup sticker and decorating your mug.
The pineapple silhouette design is perfect for every fan of this fruit. It has a recognizable shape and will look super cute in different projects, including your t-shirts, mugs, laptops, water bottles, regular paper cuts, etc.

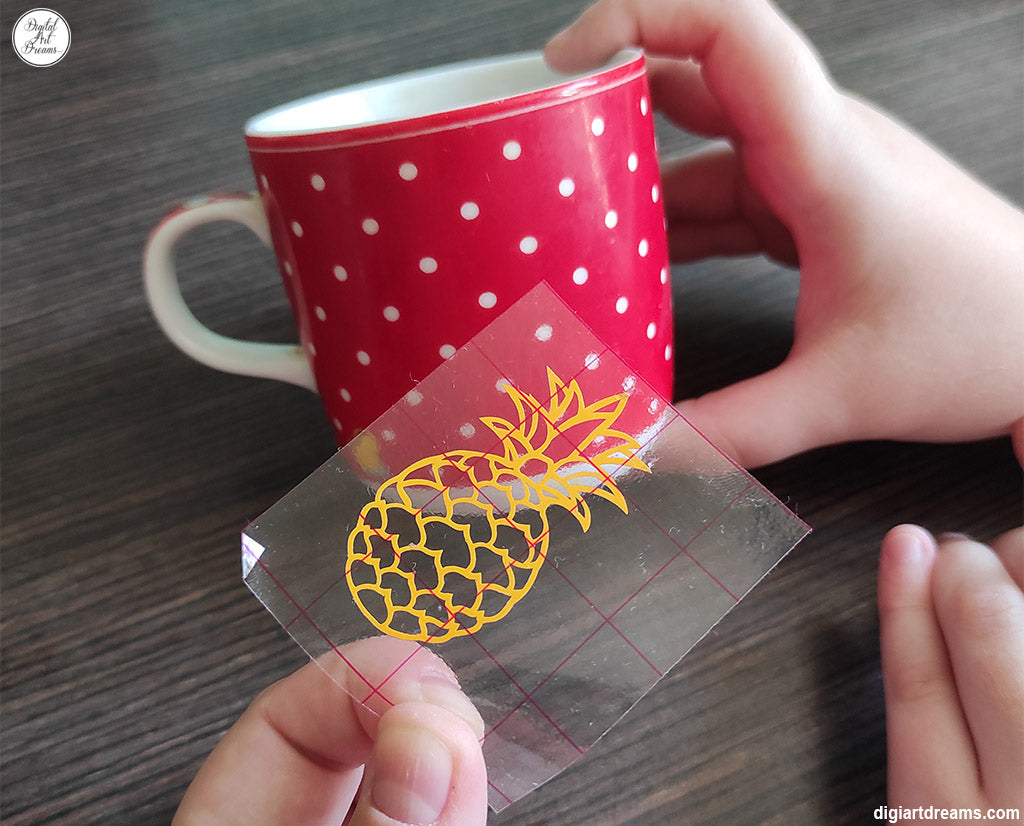
DIY Cup Sticker
Cricut vinyl stickers are simple to make. Every project that requires using vinyl is so exciting because this material is quick to cut and weed.
We created some pineapple crafts on our Cricut Explore Air 2. Still, you can work with vinyl and other materials on Cricut Maker, Cricut Explore 3, Silhouette, and other paper cutting machines. They will all cut vinyl perfectly well!
You will enjoy creating a unique pineapple DIY cup sticker for every mug in your home and other surfaces. The crafting result will look stunning!

Here are the supplies needed for this vinyl cup sticker craft (perfect for beginners):
- Premium Pineapple SVG file (or any other SVG file of your choice);
- Your paper cutting machine;
- A piece of an adhesive vinyl sheet (glitter, glossy, matte, holographic, regular) of any color you like - we used these vinyl sheets;
- Clear vinyl transfer paper;
- Cricut essential tools;
- A cutting mat.
Disclosure. This post includes Amazon affiliate links to Cricut paper cutting machines and adhesive vinyl sheets. We might earn a small commission at no cost to you if you purchase through the links.
Learn how to cut vinyl with Cricut Explore Air 2. But this guide also works well for all other paper cutting machines.
How to Cut Vinyl Cricut Explore Air 2
All the things you should do are quick and friendly. And although there are enough steps in this instruction, you will love them all and how quickly the time goes as you are crafting a DIY pineapple cup sticker.
Step 1. Turn on your Cricut machine after making sure it is connected to your computer and powered.
Launch Cricut Design Space. Start a new project and "Upload" the Pineapple SVG file by Digital Art Dreams (or your SVG file).

Measure your cup and adjust the size of the pineapple template. We downscaled the file to 2 inches in height, and Cricut Design Space automatically scaled the width to 1.089 inches.
When you are happy with the actual size of your cut, click the green "Make It" button on the top right.
Step 2. Put your vinyl on the top left corner of a LightCrip cutting mat (although StandardGrip also works well). If you don't like to waste material, use regular scissors to cut a slightly bigger piece than your SVG file by 0.5 inches on top and one side beforehand.

Step 3. Turn the dial on Explore Air 2 to "Vinyl" and put the mat under the guides. Look at your Design Space; it will prompt you to press the load-unload button on your machine (it will flash).
The mat will move under the rollers, and the blade will prepare for cutting.
Press the go button on your paper cutting machine just as suggested on the screen of Design Space. And wait.
Vinyl is very fast to cut! So, you won't have to wait long.
Step 4. Press the load-unload button on Explore Air 2 once again. And the mat will be freed. You can take it out now.

Use a weeding tool to remove the leftover pieces of vinyl top material and leave only the pineapple silhouette on the paper backing. Some people love this process, and others don't. But it is an essential step in our project.

Step 5. Cut a piece of clear transfer tape that matches the size of your vinyl piece.

Put the top film over your vinyl pineapple.

Use a scraper now. It is a must to pressure very well to help vinyl adhere to your transfer tape. Avoid air bubbles.

Start removing the clear tape very slowly. Make sure that all pieces of vinyl have adhered well. If the grip is not firm in some areas, you can press there again.

How to Put a Vinyl Sticker on a Cup
This procedure is even faster than a previous step. You will complete it in about a minute or so.
Step 6. Now it is time to apply your DIY cup sticker to your mug. Ensure the surface is clean and dry; think of the exact place you wish the silhouette to appear and put the tape there.
Step 7. Use your fingertips to rub the tape to make sure vinyl transfers to the cup. Then start removing the clear tape very slowly.

Make sure that all pieces of vinyl have transferred well on your mug.

Hooray! You have crafted a unique cup with a vinyl pineapple sticker on it. We used orange vinyl, but you can go with golden, silver, rainbow, or other colors.
Be creative and cut vinyl stickers for candles, buckets, notebooks, clipboards, etc. Every vinyl-related idea is worth your time and effort! You can think of a perfect teacher, birthday, wedding, Christmas gift and make it with love and care.
A little bit of vinyl, your Cricut paper cutting machine, and highly detailed SVG files are an exciting combination for creative crafters. So work on your DIY cup sticker now! Use #saycrafts on Instagram @digitalartdreams to share your beautiful projects.
Wow, what a cute idea! I love pineapples and I have Cricut machine. I will bookmark this guide. Thank you!