Cutting elegant lace artworks out of paper is easy if you have an excellent paper cutting machine. Cricut Explore Air 2 is undoubtedly one of the most affordable and popular machines in the market today. See its unboxing photos and read reviews to figure out if this is something you could love.

In this post, you will also learn how to set up the Cricut Explore Air 2 mint machine, do a test print, and create unique papercuts using premium SVG files.
Cricut Explore Air 2 Mint
While you can already purchase the latest Cricut Explore 3 that cuts without a machine mat, the Air 2 is way cheaper and delivers similar results with a cutting mat. The Explore 3 costs at least $299, and Air 2 costs under $200 on Amazon.
Disclosure. This post includes Amazon affiliate links to Cricut paper cutting machines. We might earn a small commission at no cost to you if you purchase through the link.
Our brand-new Cricut Explore Air 2 Mint machine arrived on time, wrapped with attention to every detail, and boxed very well. Unboxing did not take long.
As you can see on the unboxing photos, the cords, accessories, and the machine itself were packed in pressed cardboard. This extra protection is superb when your product ships overseas.

What's included in the package with Cricut Explore Air 2 Mint:
- A fine point blade (already installed);
- One light-grip adhesive cutting mat, 12" x 12";
- One black pen;
- USB cable to connect to a computer;
- Power cord;
- Getting Started guidelines;
- Samples of cardstock;
- Warranty;
- Welcome Book;
- Cricut Explore Air 2 paper cutting machine.

Additional weeding tools, scraper, scissors, tweezers, stylus are not included. You will have to order them separately.
Cricut Explore Air 2 Setup
Guides on how to use the Cricut Explore Air 2 are simple. The company offers an on-screen guide that is super easy to follow. It makes the setup process a breeze.
Here is a quick instruction for Cricut Explore Air 2 setup with pictures:
Step 1. Connect a paper cutting machine to your computer and plug it in. You will find the two connection ports on the back.

Step 2. Power on your Cricut Explore Air 2.
Step 3. An internet connection on your computer is a must. Go to cricut.com/setup in your favorite browser.
Step 4. Download and install Cricut Design Space. Or, if you have it installed, update it. For example, our software was updated to version v.6.11.113.

Step 5. There are two options:
- Product Setup;
- Sign in.
The first option is for new users who do not have an account with Cricut yet. You will have to type in your email, choose a strong password, enter your first and last name, choose your country, checkmark the two options, and click "Register."
The "Sign in" feature is for users with an active account.
Step 6. Now, you should see the "Welcome to Cricut Setup" screen. Here choose Smart Cutting Machine to proceed with Cricut Explore Air 2 setup.
Step 7. Select your paper cutting machine from the list. Scroll down to find the Cricut Explore Family, which includes the Air 2.

Step 8. The next thing to do is preparing your workspace. It is necessary to place your device to have some free space behind it (10 inches or 25 cm). And update your software to be sure you are up to date.
Step 9. Finish registering your machine by adding it to your Cricut ID by checking the mark next to "Agree to Terms of Use" and clicking "Register."
That's it. You have complete Cricut Explore Air 2 setup and now learn how to use your paper cutting machine. The software lets you do a practice project.
P.S. Some users are lucky to get access to Cricut Access Standard, free for 30 days (then it will cost $9.99 a month). However, this option is only available to U.S. customers with a credit/debit card issued by the U.S. bank.
How to Use the Cricut Explore Air 2
Once you unbox and set up the Cricut Explore Air 2 (mint, lilac, blue, rose, gold, etc.), it is time to test your first cut.
The Cricut Design Space installed on your computer will guide you through this process. Here is what you can try:
Step 1. Cricut Design Space prompts you to select an image. There are several black silhouettes, including lips, bear, sunflower, etc. Click "Next" to proceed.

Step 2. Depending on your material, turn the dial on your paper cutting machine to match it. For example, we chose to test cardstock and turned the dial to "Cardstock" mode.

Step 3. Choose a piece of cardstock and place it on the top left corner of your cutting mat. Make sure to remove the protecting film from your mat before doing this. The cardstock will stick to the mat.

Step 4. Make sure the blade is well set in clamp B, and place the mat under the guides towards your Cricut Explore Air 2 rollers.

Step 5. Press the load-unload button. It will flash so you will know which button it is.
Step 6. Click the go button and wait for the test print to complete.

Step 7. Press the load-unload button to remove the mat, carefully remove the cut image and cardstock, clean the mat. You are ready for new paper-cutting adventures.

The test bear looks like a bear, which is fantastic! Although our Cricut Explore Air 2 did not cut the cardstock very well, there were slight rips during the removal process.
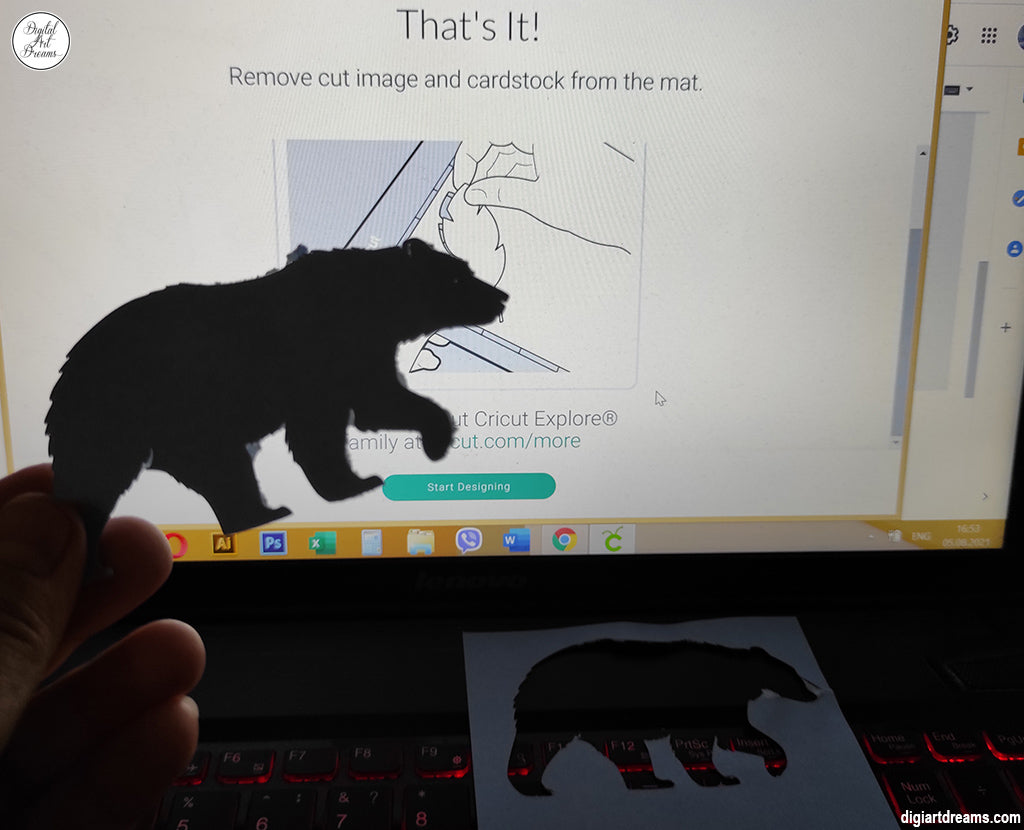
So, we decided to run another test and cut a monarch butterfly out of white paper. We tested the Monarch Butterfly SVG files from Digital Art Dreams, and both projects turned out super cute.
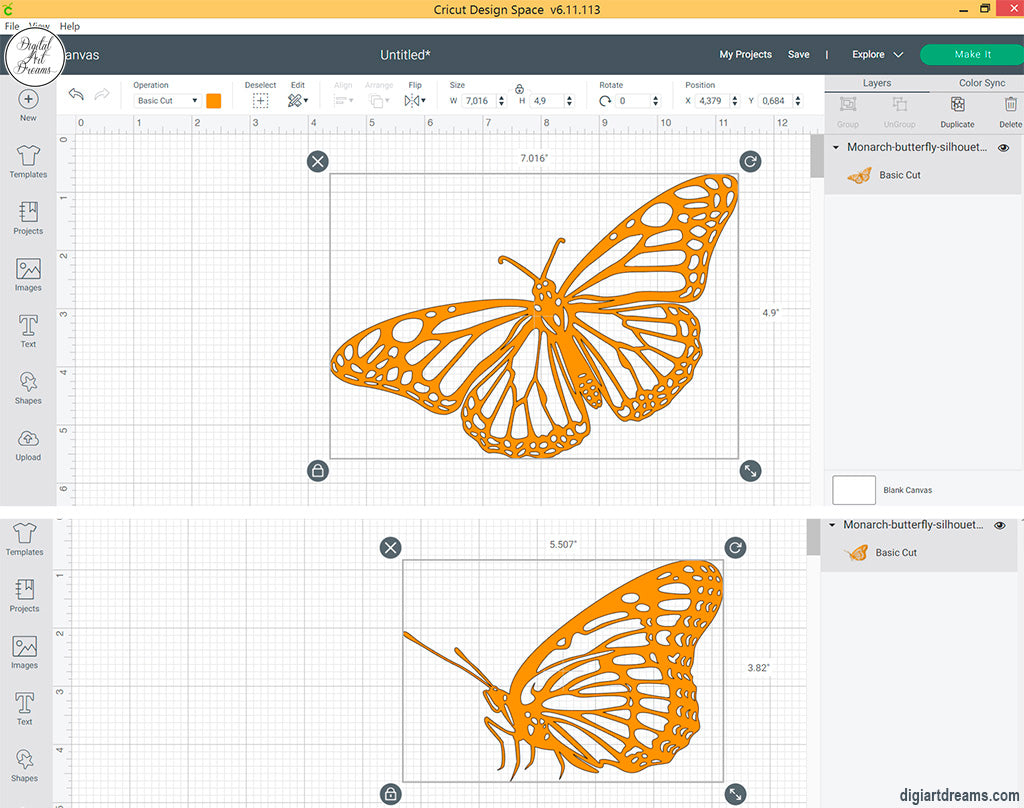
Only make sure to turn the dial to "Paper" if cutting with regular white paper. Upload the butterfly SVG file into Cricut Design Space, choose "Make it." Then, repeat the process of loading the cutting mat with paper placed on its left corner and running the machine.

With additional Cricut tools, you will enjoy weeding the artwork to have clean edges. Such paper crafts look unique and can decorate your room!

Cricut Explore Air 2 Reviews
As newbies, we fell in love with the Cricut Explore Air 2 paper cutting machine. It is super quick to cut and easy to use. The Design Space is simple to start new projects and send the SVG files for cutting.
It upsets that the Cricut Access Standard is only available to users with credit cards issued by U.S. banks. Otherwise, the free Design Space app works excellent with individual SVG files.
__________
We hope that our Cricut Explore Air 2 unboxing and setup guides will help you run your paper cutting machine for the first time. Read reviews on the web, choose individual SVG files, and be creative! Paper cutting projects can be fantastic for families with kids. Besides, Cricut machines work with vinyl, cardstock, bonded fabric, iron-on, and other materials, so your creativity is not limited to just paper cuts!
I also have a Cricut Explore Air 2. Thinking of getting the Explore 3, and I love your cute butterfly cuts! Adorable!